

已经在linode的VPS上测试通过……
准备工作
- CentOS 7 x64的服务器
- sudo权限或root用户
一、升级内核
为了使用BBR,我们需要将CentOS 7机器的内核升级到4.9.0以上,可以使用ELRepo RPM库来完成。
在升级之前,可以先看看当前的内核:
uname -r
该命令应输出一个类似于以下内容的字符串:
3.10.0-514.2.2.el7.x86_64
表示当前内核为3.10.0
安装ELRepo repo:
rpm --import https://www.elrepo.org/RPM-GPG-KEY-elrepo.org
rpm -Uvh http://www.elrepo.org/elrepo-release-7.0-2.el7.elrepo.noarch.rpm
从ELRepo安装新版内核:
yum --enablerepo=elrepo-kernel install kernel-ml -y
确认内核是否安装成功:
rpm -qa | grep kernel
如果安装成功,应该在输出中看到类似kernel-ml-4.*-*.*.elrepo.x86_64这样的条目:
kernel-3.10.0-693.el7.x86_64
kernel-headers-3.10.0-693.17.1.el7.x86_64
kernel-devel-3.10.0-693.17.1.el7.x86_64
kernel-ml-4.15.9-1.el7.elrepo.x86_64
kernel-3.10.0-693.2.2.el7.x86_64
kernel-tools-libs-3.10.0-693.17.1.el7.x86_64
kernel-3.10.0-693.17.1.el7.x86_64
kernel-tools-3.10.0-693.17.1.el7.x86_64
因为Linode内核是官方修改过的,所以应当先安装Grub2,然后再修改内核。
切换内核:
mkdir /boot/grub
grub2-mkconfig -o /boot/grub/grub.cfg
会返回类似如下内容:
Found linux image: /boot/vmlinuz-4.15.9-1.el7.elrepo.x86_64
Found initrd image: /boot/initramfs-4.15.9-1.el7.elrepo.x86_64.img
Found linux image: /boot/vmlinuz-3.10.0-693.17.1.el7.x86_64
Found initrd image: /boot/initramfs-3.10.0-693.17.1.el7.x86_64.img
Found linux image: /boot/vmlinuz-3.10.0-693.2.2.el7.x86_64
Found initrd image: /boot/initramfs-3.10.0-693.2.2.el7.x86_64.img
Found linux image: /boot/vmlinuz-3.10.0-693.el7.x86_64
Found initrd image: /boot/initramfs-3.10.0-693.el7.x86_64.img
Found linux image: /boot/vmlinuz-0-rescue-e0c9675cb81c416ebcfaa6be69b57691
Found initrd image: /boot/initramfs-0-rescue-e0c9675cb81c416ebcfaa6be69b57691.img
done
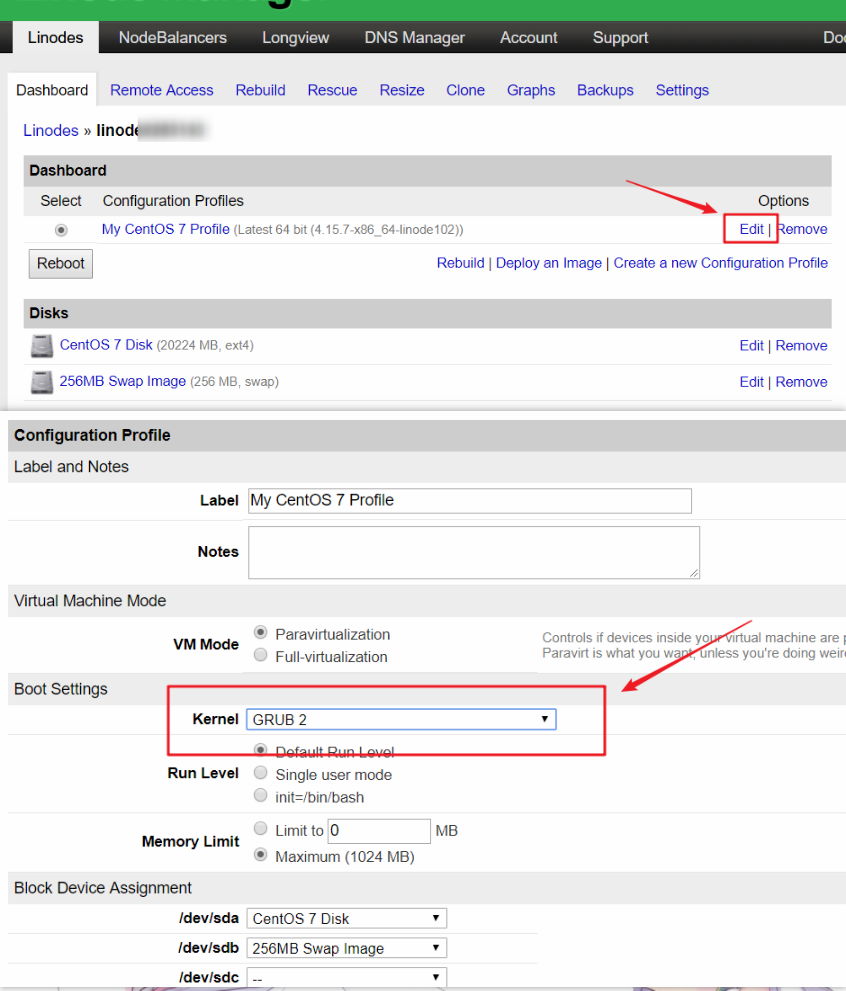
接着在Linode后台 – Dashboard – Edit,进行编辑,选择启动方式为GRUB 2,如下截图。
调整GRUB启动顺序,更改grub2启动项来启用4.9.0内核。
先查看一下grub2中的所有启动项:
egrep ^menuentry /etc/grub2.cfg | cut -f 2 -d \'
输出应类似于:
CentOS Linux 7 Rescue a0cbf86a6ef1416a8812657bb4f2b860 (4.9.0-1.el7.elrepo.x86_64)
CentOS Linux (4.9.0-1.el7.elrepo.x86_64) 7 (Core)
CentOS Linux (3.10.0-514.2.2.el7.x86_64) 7 (Core)
CentOS Linux (3.10.0-514.el7.x86_64) 7 (Core)
CentOS Linux (0-rescue-bf94f46c6bd04792a6a42c91bae645f7) 7 (Core)
注意引导项的序号是从0开始的,也就是第一行为0。而4.9.0内核入口(CentOS Linux (4.9.0-1.el7.elrepo.x86_64) 7 (Core))在第二行,因此将默认引导项设置为1:
grub2-set-default 1
先查询启动选项内容:
cat /boot/efi/EFI/centos/grub.cfg |grep CentOS
menuentry 'CentOS Linux (4.20.11-1.el7.elrepo.x86_64) 7 (Core)'
menuentry 'CentOS Linux (3.10.0-957.5.1.el7.x86_64) 7 (Core)'
menuentry 'CentOS Linux (3.10.0-957.el7.x86_64) 7 (Core)'
menuentry 'CentOS Linux (0-rescue-ccc9965824a34033a788f8324027b717) 7 (Core)'
变更默认启动项为新内核:
grub2-set-default 'CentOS Linux (4.20.11-1.el7.elrepo.x86_64) 7 (Core)'
确认默认启动项无误:
grub2-editenv list
saved_entry=CentOS Linux (4.20.11-1.el7.elrepo.x86_64) 7 (Core)
重启系统:
reboot

#或者
shutdown -r now
重启后,使用uname命令以确认使用的是更新后的的内核:
uname -r
如果配置正确应当返回类似这样结果:
4.9.0-1.el7.elrepo.x86_64
到这里内核升级部分就结束了。
二、启用BBR
修改sysctl配置启用BBR算法:
echo 'net.core.default_qdisc=fq' | tee -a /etc/sysctl.conf
echo 'net.ipv4.tcp_congestion_control=bbr' | tee -a /etc/sysctl.conf

# 加载 /etc/sysctl.conf 文件中的参数并显示,主要看看有没有报错的设置
sysctl -p
验证BBR是否开启:
sysctl net.ipv4.tcp_available_congestion_control
输出应类似:
net.ipv4.tcp_available_congestion_control = bbr cubic reno
然后再验证:
sysctl -n net.ipv4.tcp_congestion_control
输出应是:
bbr
最后,检查内核模块是否已加载:
lsmod | grep bbr
输出应类似:
tcp_bbr 16384 0
到此为止,BBR就成功开启了。
三、测试网络性能(可选)
为了测试配置BBR后网络性能的增强,可以在Web服务器目录中创建一个文件,然后从自己电脑上下载以测试速度。
yum install httpd -y
systemctl start httpd.service
firewall-cmd --zone=public --permanent --add-service=http
firewall-cmd --reload
cd /var/www/html
dd if=/dev/zero of=500mb.zip bs=1024k count=500
从自己电脑上的浏览器访问URL:http://[你的服务器地址]/500mb.zip,测试下载速度。
