
之前NAS换下来的J4105主板还能接着发挥余热,换个壳子当软路由用吧,比用arm的openwrt性能不知高到哪里去了(其实是CentOS用习惯了
一、硬件选择
这个不多说了,J4105的性能用来跑软路由都可以说是大材小用了……
就是套的壳子丑了点,反正等调试完塞机柜里面也看不见了
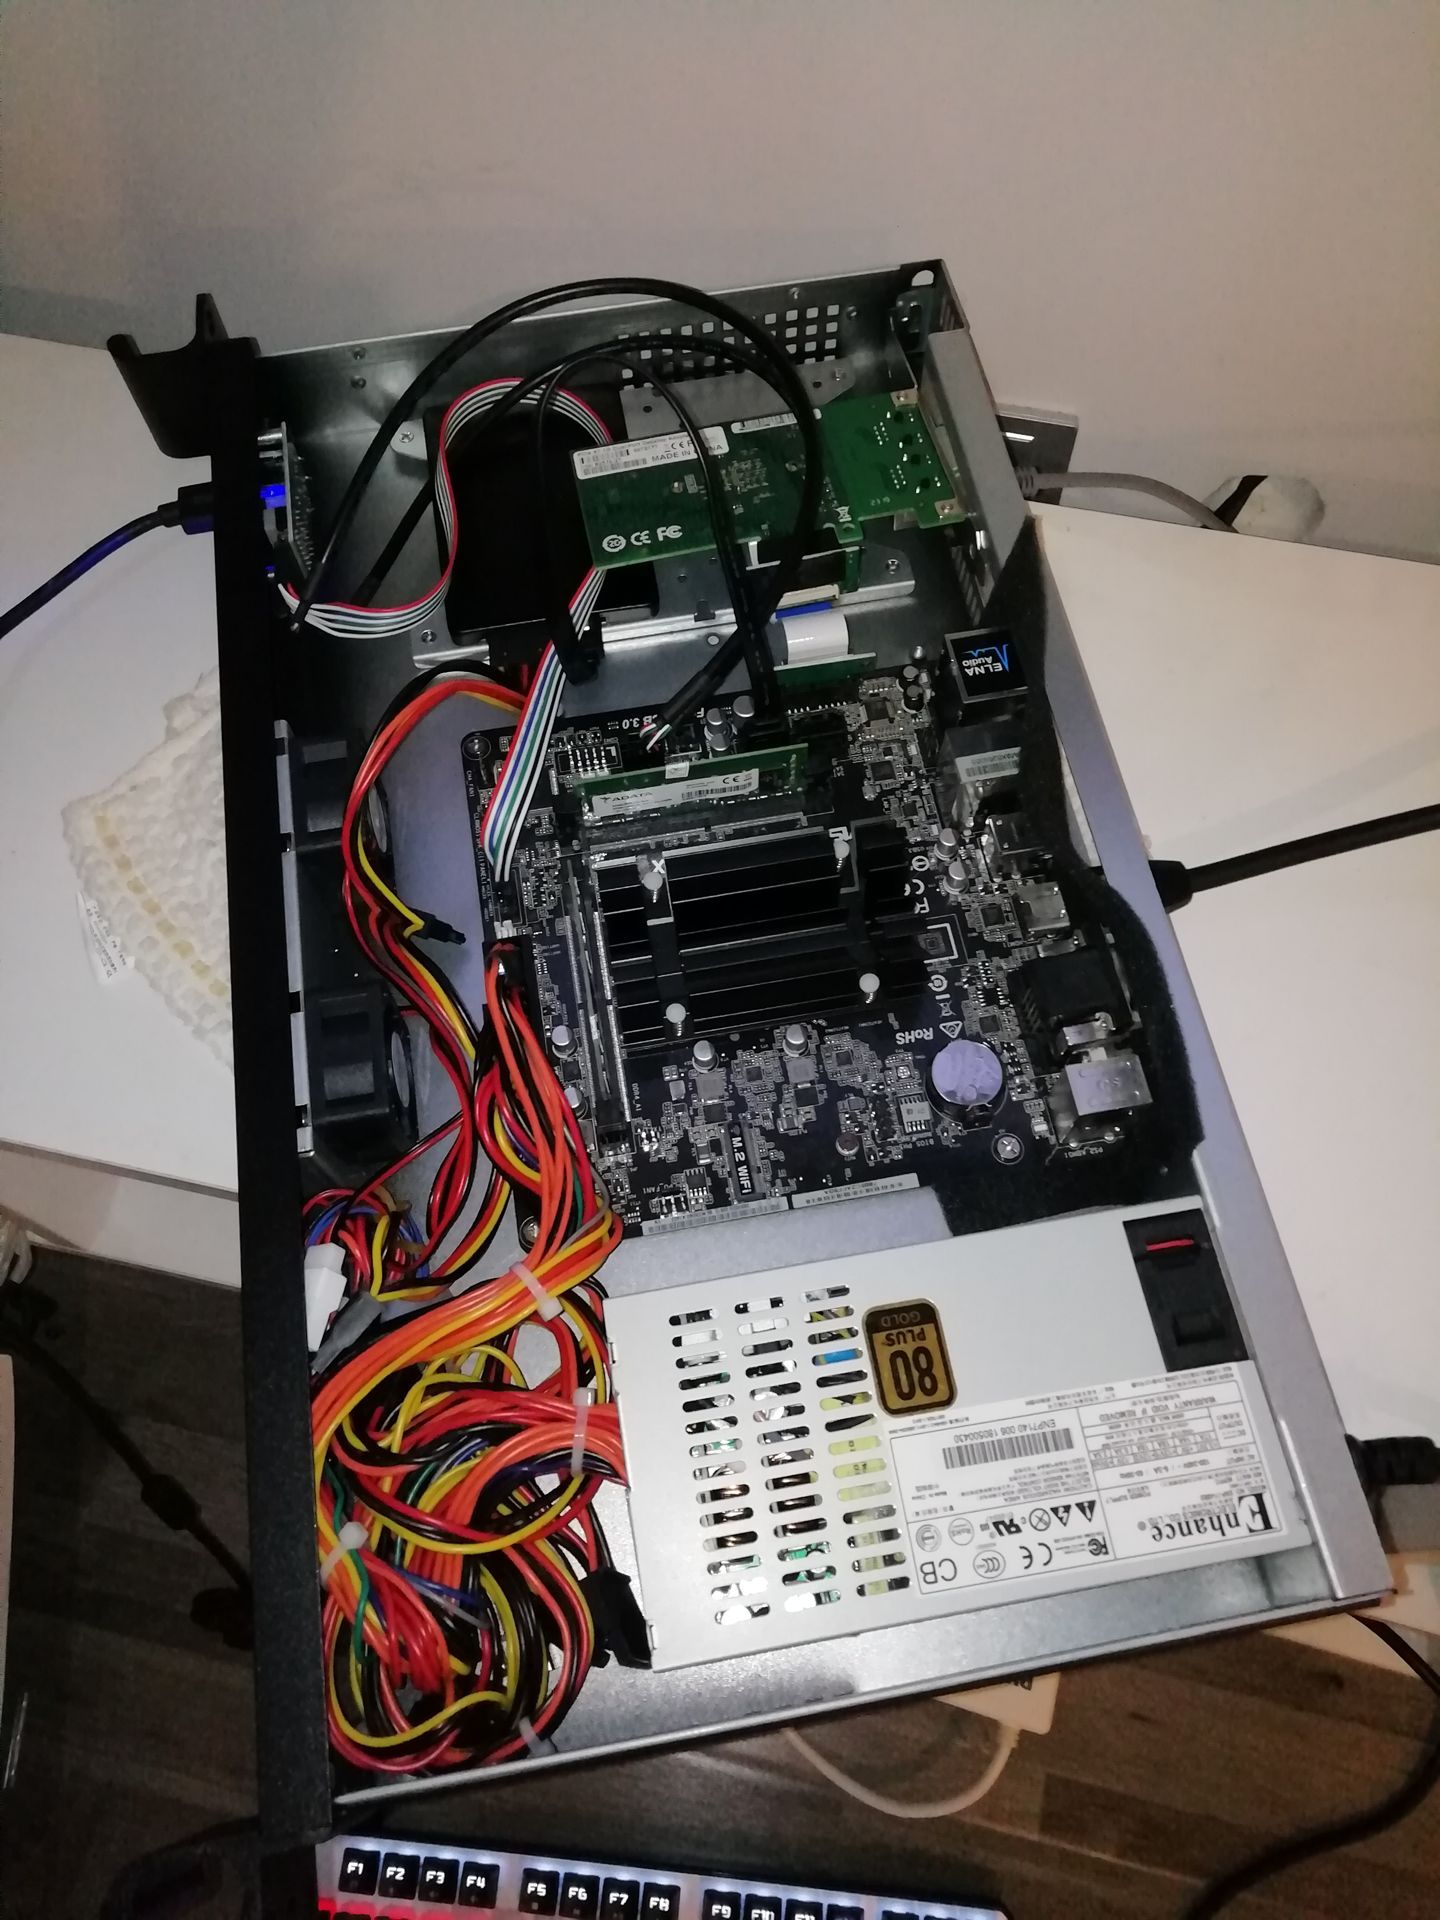
本机只使用了一块只有两个网口的pcie网卡,另外使用了一台交换机,本人目前没有太多需求故本文不涉及VLAN划分,更何况交换机自带傻瓜式VLAN隔离(虽然我不用。
二、配置网络
这里不得不再吐槽一下网上的各种“教程”,那玩意儿真™能叫教程?还好有RHEL的文档参考,不得不说红帽的官方文档那叫一个厚啊,光网络配置都有15章,看的我是头皮发麻。
首先说明我这台机器的网卡配置,一张pcie的双网口网卡,用来当LAN口用,一张主板板载网卡,当WAN用。
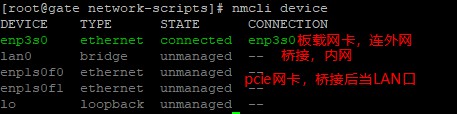
当然上图显示的是配置好的,我们现在开始从头来配置一遍吧。
首先配置作为WAN口的网卡,这里是enp3s0,这个的配置是最最简单的,等同于配置一般正常上网的网卡,一般来说家里的入口网关一般都是三大运营商的光猫,现在基本都是在光猫上配置好拨号了,直接就用DHCP获取ip好了(关掉光猫的wifi等其他所有不需要的功能,你就老老实实当个入口路由好了,还省的夏天发烫)。
配置的时候默认光猫的192.168.1.0/24为外网网段,设置192.168.200.0/24为内网网段。
先进入网卡配置文件所在目录,并编辑enp3s0网卡配置:
cd /etc/sysconfig/network-scripts/

vim ifcfg-enp3s0
配置如下:
TYPE=Ethernet    #指定接口类型为以太网
PROXY_METHOD=none
BROWSER_ONLY=no
BOOTPROTO=dhcp    #通过DHCP获取TCP/IP参数
DEFROUTE=yes    #默认路由
IPV4_FAILURE_FATAL=no
IPV6INIT=yes    #初始化IPv6
IPV6_AUTOCONF=yes    #开启IPv6自动配置
IPV6_DEFROUTE=yes    #IPv6默认路由
IPV6_FAILURE_FATAL=no
IPV6_ADDR_GEN_MODE=stable-privacy
NAME=enp3s0
UUID=12345678-aaaa-bbbb-cccc-12345678abcd    #网卡UUID
DEVICE=enp3s0
ONBOOT=yes    #开机自动开启接口
IPV6_PRIVACY=no
实际上,上面的配置基本是系统已经自动配置好的,都不用改动,因为只要能上网,这个配置怎么样都好啦~
接下来我们为内网的两个LAN口创建一个桥接(如果你的机器只有两个网口,那么建立这个桥接就不是必须的了,只需要把这个bridge的配照抄到作为LAN口的网卡上就OK了):
vim ifcfg-lan0
(把这个桥接名字也取成lan)编辑配置:
TYPE=Bridge    #指定接口类型为网桥
BOOTPROTO=static
NM_CONTROLLED=no    #禁用NetworkManger
NAME=lan0
DEVICE=lan0
ONBOOT=yes
STP=yes    #启用生成树
DELAY=0    #不延迟启动

IPADDR=192.168.200.100    #配置ip
NETMASK=255.255.255.0    #子网掩码
NETWORK=192.168.200.0    #网络地址
GATEWAY=192.168.200.100    #网关地址
BROADCAST=192.168.200.255    #广播地址
内网的桥接配置好了之后,我们接着来配置当LAN口的网卡,这每个LAN口的配置都一模一样,只是UUID和设备名不同,这里就只以其中一个为例:
vim ifcfg-enp1s0f0
配置如下:
TYPE=Ethernet
BOOTPROTO=none    #不配置TCP/IP参数
NM_CONTROLLED=no
NAME=enp1s0f0
UUID=12345678-aaaa-bbbb-cccc-12345678abcd
DEVICE=enp1s0f0
ONBOOT=yes
IPV6_PRIVACY=no
BRIDGE="lan0"    #桥接到lan0
这样网卡就配置好了,我们重启网络吧应用配置吧:
systemctl restart network
之后查看我们的网卡信息,都ok了:
[root@gate network-scripts]# ip addr
1: lo: <LOOPBACK,UP,LOWER_UP> mtu 65536 qdisc noqueue state UNKNOWN group default qlen 1000
    link/loopback 00:00:00:00:00:00 brd 00:00:00:00:00:00
    inet 127.0.0.1/8 scope host lo
       valid_lft forever preferred_lft forever
    inet6 ::1/128 scope host
       valid_lft forever preferred_lft forever
2: enp3s0: <BROADCAST,MULTICAST,UP,LOWER_UP> mtu 1500 qdisc pfifo_fast state UP group default qlen 1000
    link/ether 70:85:c2:af:f9:ba brd ff:ff:ff:ff:ff:ff
    inet 192.168.1.2/24 brd 192.168.1.255 scope global noprefixroute dynamic enp3s0
       valid_lft 82805sec preferred_lft 82805sec
    inet6 240e:39a:32c:9910:649f:5ef2:d994:6837/64 scope global noprefixroute dynamic
       valid_lft 221925sec preferred_lft 135525sec
    inet6 fe80::f714:3740:125d:a067/64 scope link noprefixroute
       valid_lft forever preferred_lft forever
3: enp1s0f0: <BROADCAST,MULTICAST,UP,LOWER_UP> mtu 1500 qdisc mq master lan0 state UP group default qlen 1000
    link/ether 00:1b:21:36:a9:00 brd ff:ff:ff:ff:ff:ff
    inet6 fe80::21b:21ff:fe36:a900/64 scope link
       valid_lft forever preferred_lft forever
4: enp1s0f1: <BROADCAST,MULTICAST,UP,LOWER_UP> mtu 1500 qdisc mq master lan0 state UP group default qlen 1000
    link/ether 00:1b:21:36:a9:01 brd ff:ff:ff:ff:ff:ff
    inet6 fe80::21b:21ff:fe36:a901/64 scope link
       valid_lft forever preferred_lft forever
6: lan0: <BROADCAST,MULTICAST,UP,LOWER_UP> mtu 1500 qdisc noqueue state UP group default qlen 1000
    link/ether 00:1b:21:36:a9:00 brd ff:ff:ff:ff:ff:ff
    inet 192.168.200.100/24 brd 192.168.200.255 scope global lan0
       valid_lft forever preferred_lft forever
    inet6 fe80::21b:21ff:fe36:a900/64 scope link
       valid_lft forever preferred_lft forever
配置完成后,这台机器有有了一个外网ip和一个内网ip,外网ip从上级路由(光猫)获取,内网ip则为手动配置的192.168.200.100。
三、配置DHCP及DNS
现在我们的局域网已经初具雏形了,现在我们来为它配置DHCP和DNS。DHCP不必多说,各位肯定不希望自己连上家里路由器还得自己配置ip吧。至于DNS嘛,自己配置DNS服务一方面能阻断DNS污染,另一方面是在配置网关透明代理的时候有用,不过嘛这些就留到后面再说了。
DHCP和DNS服务我们都使用dnsmasq来完成。最小化安装没有,装一个先:
yum -y install dnsmasq

systemctl enable dnsmasq
systemctl start dnsmasq
接下来开始配置dnsmasq,完整的dnsmasq配置十分长,默认全部被注释,我们只需要关注以下几项,取消注释并按个人需求修改即可。
# Listen on this specific port instead of the standard DNS port
# (53). Setting this to zero completely disables DNS function,
# leaving only DHCP and/or TFTP.
# 配置端口,可被局部设置覆盖,保持注释即默认53端口,修改为0则关闭DNS服务
#port=5353

# Never forward plain names (without a dot or domain part)
# 只解析完整域名,如果仅仅是主机名仅查找hosts文件
domain-needed

# Never forward addresses in the non-routed address spaces.
# 不解析私有地址
bogus-priv

# If you don't want dnsmasq to read /etc/resolv.conf or any other
# file, getting its servers from this file instead (see below), then uncomment this.
# 不要读取resolv.conf来确定上游服务器
no-resolv

# If you don't want dnsmasq to poll /etc/resolv.conf or other resolv
# files for changes and re-read them then uncomment this.
# 不要检测resolv.conf的变化
no-poll

# Add other name servers here, with domain specs if they are for non-public domains.
# 配置上游DNS服务器,配置格式可参考下面的示例
server=127.0.0.1

# If you want dnsmasq to listen for DHCP and DNS requests only on
# specified interfaces (and the loopback) give the name of the interface (eg eth0) here.
# Repeat the line for more than one interface.
# DHCP及DNS服务监听设置,这里配置为仅监听lan0
interface=lan0

# On systems which support it, dnsmasq binds the wildcard address,
# even when it is listening on only some interfaces. It then discards
# requests that it shouldn't reply to. This has the advantage of
# working even when interfaces come and go and change address. If you
# want dnsmasq to really bind only the interfaces it is listening on,
# uncomment this option. About the only time you may need this is when
# running another nameserver on the same machine.
# 绑定接口,仅监听指定的接口
bind-interfaces

# Set this (and domain: see below) if you want to have a domain
# automatically added to simple names in a hosts-file.
# 为hosts中的主机自动添加域名
expand-hosts

# Set the domain for dnsmasq. this is optional, but if it is set, it
# does the following things.
# 1) Allows DHCP hosts to have fully qualified domain names, as long
#     as the domain part matches this setting.
# 2) Sets the "domain" DHCP option thereby potentially setting the
#    domain of all systems configured by DHCP
# 3) Provides the domain part for "expand-hosts"
# 配置域名
domain=example.com

# This is an example of a DHCP range where the netmask is given. This
# is needed for networks we reach the dnsmasq DHCP server via a relay
# agent. If you don't know what a DHCP relay agent is, you probably
# don't need to worry about this.
# 配置DHCP服务,ip池、子网掩码、租期,格式可参考配置文件下方例子
dhcp-range=192.168.200.110,192.168.200.200,255.255.255.0,12h

# Always allocate the host with Ethernet address 11:22:33:44:55:66
# The IP address 192.168.0.60
# 为设备配置固定ip,配置ip推荐不要在上面为DHCP分配的ip池中
dhcp-host=00:1b:21:36:a9:00,192.168.200.100
dhcp-host=b4:2e:99:6e:2d:05,192.168.200.101
dhcp-host=52:54:00:ea:a1:94,192.168.200.102
dhcp-host=52:54:00:88:66:56,192.168.200.103

# Set the cachesize here.
# 设置DNS缓存数
cache-size=2000

# Include all files in /etc/dnsmasq.d except RPM backup files
# 包含额外的配置文件,便于配置管理
conf-dir=/etc/dnsmasq.d,.rpmnew,.rpmsave,.rpmorig
配置完成后重启dnsmasq服务即可:
systemctl restart dnsmasq
上面的配置是比较有针对性的,仅供参考,请按照自己需求来配置。这里先说一下我为什么要这样配置,因为使用软路由的话,肯定是要拿来做透明代理的,这里DNS污染就是个绕不过去的问题,因此我们用dnsmasq把上游服务器设定为本机,之后我们会利用v2ray构建一个分流的无污染的DNS来使用,并且把/etc/resolv.conf中的域名服务器也修改为本机,以保证网关和局域网内DNS的纯净。
四、配置NAT
这是路由器的核心功能,在这里就使用iptables来完成,iptables的配置可以参考我之前的这篇文章。
首先最小化安装的centos默认是没有启用iptables的,我们先要启用它:
#安装iptables
yum install -y iptables
#安装iptables-services
yum install iptables-services

#停止firewalld服务
systemctl stop firewalld
#禁用firewalld服务
systemctl mask firewalld
配置一些初始的规则:
iptables -F
iptables -X
iptables -Z
iptables -A INPUT -i lo -j ACCEPT
iptables -A INPUT -i lan0 -j ACCEPT
iptables -A INPUT -p icmp -m icmp --icmp-type 8 -j ACCEPT
iptables -A INPUT -s 192.168.200.0/24 -j ACCEPT
iptables -A INPUT -m state --state RELATED,ESTABLISHED -j ACCEPT
iptables -P INPUT DROP
iptables -P OUTPUT ACCEPT
iptables -P FORWARD DROP
注意着里面有两条:
iptables -A INPUT -i lan0 -j ACCEPT

iptables -A INPUT -s 192.168.200.0/24 -j ACCEPT
这个之前是真把我搞的精神错乱,头皮发麻。我之前配置的时候只配置了第二条,想着内网ip放行没有问题啊,结果其他设备连上后死活不能自动分配ip,只有手动配置ip后才能够正常上网。我一直以为是dnsmasq的DHCP配置哪里有问题,结果东翻翻西找找就是找不出哪里有问题。最后实在没法了回来看iptables,我才反应过来,放行192.168.200.0/24段ip是没问题,但我设备连上后还没获取到ip呢,想要找DHCP服务获取ip就被拦下来了,这就死循环了啊(ノへ ̄、)被自己蠢哭,真吉尔丢人
按理说后面还应该有其他应用方案的补充,但是由于个人能力有限,在实际操作中发现其性能远不如专业的软路由系统,因此这篇文章写到一半也就没下文了,这篇草稿也被搁置了两年多。
刚刚整理文章的时候发现还有这篇草稿,想想写了这么多删了也可惜,多多少少还是发出来,希望其中有的内容能给有相关需要的人提供参考吧……
顺便提一下,我现在使用的软路由系统是 OPNsense,一个开源的、分支于 pfSense 和 m0n0wall 的软路由系统,有兴趣的话可以试试。
最后一版草稿编辑于 2019.8.24
发布于 2022.2.7

重启后,bridge还会好用么?我重启后,br就起不来了
我之前测试的时候没有这个问题,现在也没环境复现了😂
pppoe怎么弄?
使用 rp-pppoe 来进行 pppoe 拨号
可以参考这篇文章: https://www.unixmen.com/configure-pppoe-centos-7rhel-7/
另外, 在 CentOS 8 之后已整合入 ppp 中, 可参考: https://centos.pkgs.org/8/centos-baseos-x86_64/ppp-2.4.7-26.el8_1.x86_64.rpm.html